Le Morne Brabant Hiking Photography: How to Capture the Views Without Missing the Hike
Planning a photo-friendly Le Morne Brabant hike? Use these practical tips for light, viewpoints, phone and camera settings, trail etiquette and safer photo stops.
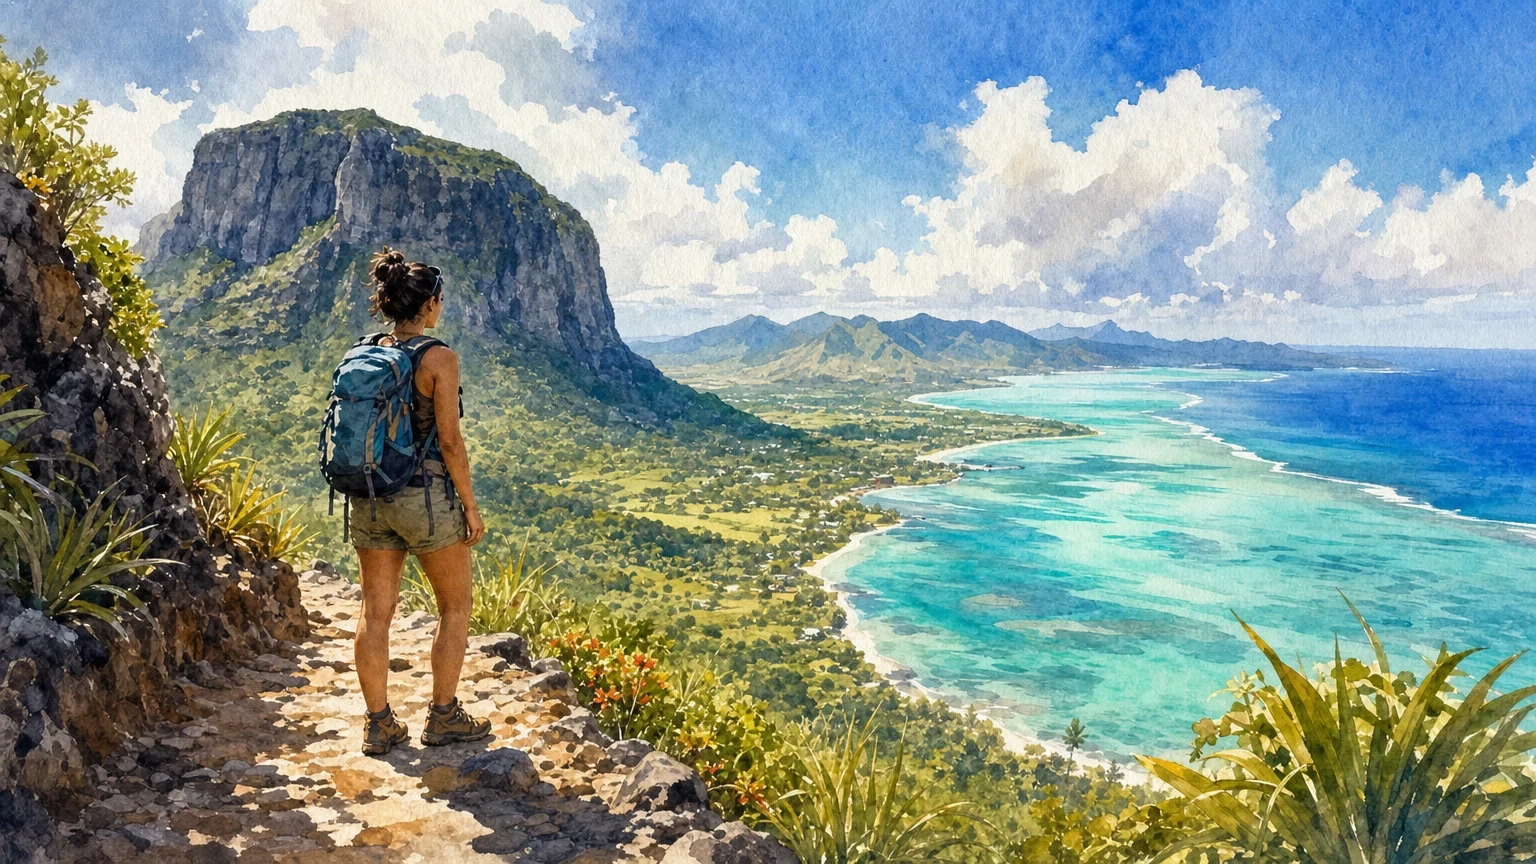
Hiker on the Le Morne Brabant trail with the Mauritius coastline in the distance
Start with the right mindset
Le Morne Brabant is one of the most photogenic hikes in Mauritius, but it is not just a viewpoint with a trail attached. It is a meaningful mountain and a UNESCO-listed cultural landscape, so it deserves a slower, more respectful kind of attention.
Good to know
FAQ
Which Le Morne experience is best for beginners who want good photos?
Look for an experience that clearly matches your hiking level, not just your photo goals. Beginners usually benefit from a steady pace, clear guidance and enough time to stop safely. Check the live listing details before booking and ask if the pace is suitable for someone who wants occasional photo pauses.
What should I bring for Le Morne Brabant hiking photography?
Bring water, sun protection, suitable walking shoes, a small daypack, a charged phone or camera, and a lens cloth. If you use a camera, keep the setup light. One versatile lens is often easier than carrying extra gear you may not use on the trail.
Can An Deor help with transport for a Le Morne hike?
Transport depends on the specific experience and provider. Some listings may include it, offer it as an option, or ask you to meet at a set point. Check the live experience details on An Deor, and ask before booking if transport is important for your plans.
That is also good photography advice. If you rush from one photo stop to the next, you may come home with a full camera roll and very little memory of the hike itself. The better plan is simple: walk at a steady pace, stop where it is safe, watch the light, and let the mountain do most of the work.
The best photo from Le Morne is never worth blocking the trail, stepping beyond a safe point, or missing the feeling of being there.
Why Le Morne is such a rewarding photography hike
Le Morne gives photographers a lot to work with in a compact hiking day: mountain slopes, changing coastal views, reef lines, lagoon colours, rocky textures and wide skies. You do not need advanced gear or formal photo training to enjoy it. A phone, a little patience and a clean lens can go surprisingly far.
The main challenge is that the view can be almost too big. When the lagoon opens below you, it is tempting to take the same wide photo ten times. Try mixing wide scenes with small details: a rock surface, a hand on a hiking pole, the shape of the trail, a passing cloud shadow on the water. These quieter frames often tell the story better than another classic panorama.
Best time of day for photos on Le Morne Brabant
For Le Morne Brabant hiking photography, soft light is your friend. Early in the day is often more comfortable for hiking and can give gentler contrast across the lagoon and mountain. Later light can also be beautiful, but your timing must fit the trail, conditions and the rules or schedule of the experience you choose.
Before booking, check the meeting time, expected duration and whether the pace leaves room for photo stops. If you are joining a guided experience, be honest about your photography plans. A guide cannot turn a hike into a private photo shoot unless that is what you booked, but they can often help you understand where it is sensible to pause.
Midday light can be harsh, especially on bright coastal days. That does not mean your photos are ruined. Use stronger sunlight for graphic shapes, shadows, textures and high-contrast scenes. If the lagoon looks too bright, turn around and photograph the mountain, the trail, or people resting in the shade where it is safe to do so.
Photo moments along the hike
Think of the hike as a sequence, not one big summit moment. Your photo story can begin before the main views appear: shoes on the trail, morning light on the vegetation, a water break, the first glimpse of the coast. These small frames help your final set feel like a real hike, not just a postcard collection.
As the views open, look for layers. A good Le Morne photo often has something close, something in the middle and something far away: rock in the foreground, the slope below, then lagoon and reef beyond. This adds depth and stops the sea from looking like a flat blue strip.
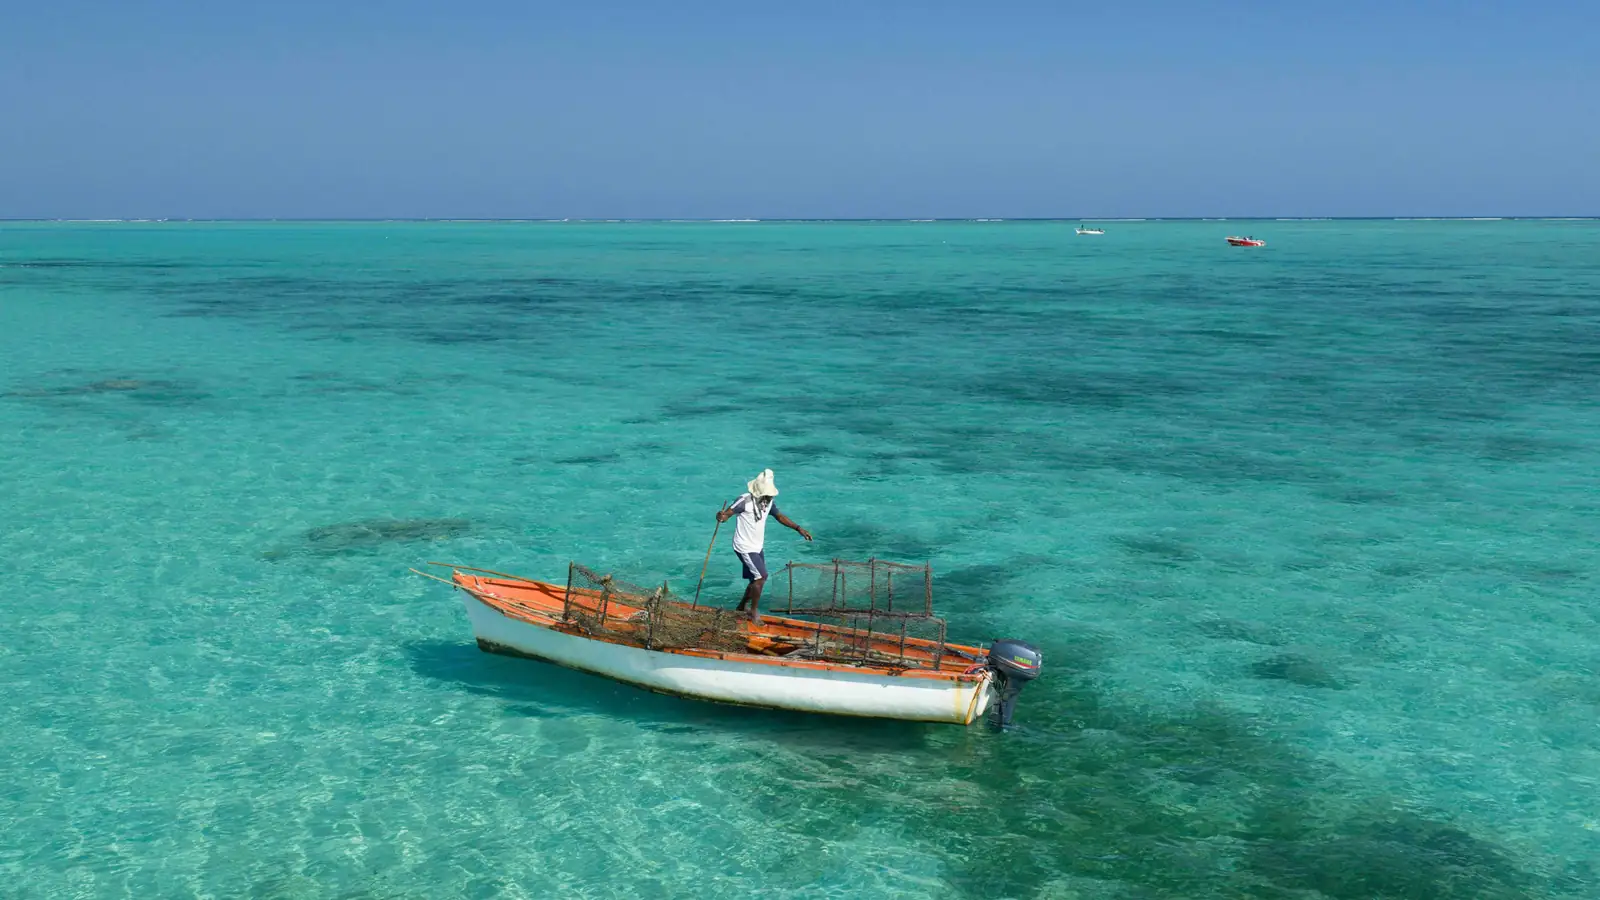
How to photograph the lagoon and coastline
The lagoon is the star in many Le Morne images, but it can be tricky. Bright water can fool your phone or camera into overexposing the scene. If the water looks washed out, reduce the exposure slightly before taking the shot. On most phones, you can tap the bright area and slide the exposure down a little.
Keep your horizon straight. It sounds basic, but a tilted ocean is one of those things you only notice later, usually with a small sigh. Turn on the grid in your camera app and use it to line up the reef or horizon.
For stronger compositions, place the coastline or reef line off-centre rather than cutting the image exactly in half. If you include a person, keep them safely on the trail or at a secure viewpoint. A tiny hiker in the frame can show scale without needing anyone to pose dramatically near an edge.
Phone photography tips for Le Morne
You can take excellent Le Morne photos on a phone if you keep things simple. Clean the lens before you start. Use the main camera for the best quality. Avoid heavy digital zoom if you can, because it can make the image soft. If your phone has an ultra-wide lens, use it carefully: it is great for big views, but it can make people at the edge of the frame look stretched.
Use portrait mode sparingly. It can work well for a person with the coastline behind them, but hair, hats and hiking poles can confuse the blur effect. Take one portrait-mode version and one normal version so you have a backup.
Short video clips can be just as valuable as photos. Try a slow pan from the trail to the lagoon, or a few seconds of wind moving through vegetation. Keep the phone secure with both hands and film only when you are standing still in a safe place.
Camera gear: what is useful and what can stay at the hotel
For most travellers, lighter is better. A camera body with one versatile lens is usually more pleasant than a heavy bag of options. If you enjoy landscape photography, a wide lens can be useful for the big coastal views. A standard zoom is a practical choice if you want landscapes, people and trail details without changing lenses often.
A polarising filter can help manage glare on water in some conditions, but it is not magic. Use it gently and check the sky, especially with wide lenses, as the effect can become uneven. A small lens cloth is almost always useful. Sweat, sea air and fingerprints are not kind to sharp photos.
Think twice before carrying a tripod. It adds weight, slows you down and can get in the way on a shared trail. If you do bring one, use it only where there is enough space and never block other hikers. A small, secure camera clip or strap is more useful for many people.
Safety and trail etiquette for photographers
Photography should fit around the hike, not the other way round. Stop before you shoot. Step aside only where there is clear, safe space. Let faster hikers pass. Do not ask someone to stand somewhere uncomfortable just for a photo. If a guide gives an instruction, follow it first and take the photo second.
Be careful with social media habits on mountain trails. Jump shots, edge poses and walking backwards while filming are not worth it. The view is already strong; it does not need a risky performance.
Respect the mountain’s cultural meaning too. Avoid loud photo sessions, props that feel out of place, or behaviour that treats the landscape as a studio set. A calm, thoughtful approach will give you better images and a better day.
Weather, clouds and changing light
Weather can change the mood of Le Morne quickly. Cloud is not automatically bad for photography. It can soften the light, add texture to the sky and create shadows across the lagoon. If the view is partly covered, wait a few minutes when it is safe and practical. Sometimes the best frame appears between two less exciting ones.
Protect your gear from rain, sweat and dust. A simple dry bag or protective pouch inside your daypack is a good idea for cameras and phones. If the conditions become poor, focus on the hike and follow local guidance. No photo plan is more important than getting down calmly and safely.
Suggested shot list for the hike
A shot list can help you stay creative without overthinking every stop. Keep it short and flexible. Try to come back with: one wide lagoon view, one vertical frame for your phone screen, one photo with a person for scale, one trail detail, one quiet cultural or landscape-respect image, one candid hiking moment, and one photo you take just for yourself rather than for anyone else.
That last one matters. Not every image needs to be posted, edited or judged. Sometimes the best Le Morne photo is the slightly imperfect one that reminds you how the wind felt and how hard you worked for the view.
Choosing a photo-friendly Le Morne experience on An Deor
If photography is one of your main reasons for hiking Le Morne, compare experiences with pace, group style and timing in mind. A very tight schedule may not suit someone who wants to pause often. A guided hike can be helpful if you want local context, route confidence and a clearer sense of where photo stops make sense.
Before booking, read the live experience details carefully and ask practical questions if anything is unclear: start time, expected pace, what to bring, whether transport is included or optional, and whether the experience is suitable for your hiking level. Honest questions before the hike usually make the day smoother for everyone.
Andeor guidance
Find the right experience
Explore live An Deor marketplace experiences and choose the day that fits your group, pace and photo plans.